What is Cloud Bookmarks™?
Cloud Bookmarks™ is an extension that works in Chrome browsers. It replaces "new tab" or "homepage" in your Chrome browser.
How to setup Cloud Bookmarks™?
Install the Extension

First Run
When you first time run extension, it will sync all your bookmarks and store them securely in your browser database. Depending on how many bookmarks you have, new tab might reload once the sync is finished.
Ready to Use
Your new tab is ready to be used. Add, edit, or delete chrome bookmarks, but don`t forget, if you delete chrome bookmark in the extension, you will delete it from Chrome as well.

How Cloud Bookmarks™ Work?
Chrome Bookmark Editor
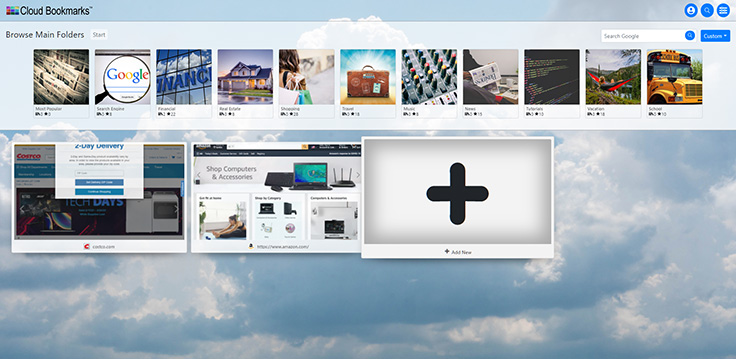
Cloud Bookmarks™ is visually separating folders from bookmarks. In top row you can see Folders, while beneath, you see bookmarks.
By clicking on any folder in the top area, bookmarks from that folder will be displayed beneath.
If you, click on a folder in the bottom area, you will navigate to that folder and both top row and bottom rows will be refreshed.
While using the Cloud Bookmarks™ extension, you will have access to all of your Chrome Bookmarks. You will be able to add new bookmarks, edit existing or delete them.
Create a New Bookmark
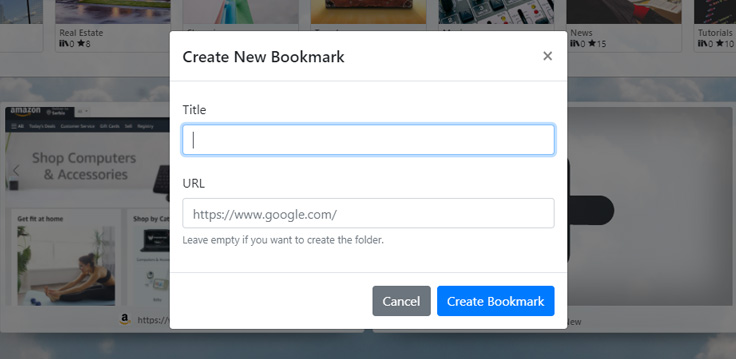
Click on + symbol in the bottom part of the screen. You will be presented with a popup, asking you for Title and URL. By filling both fields, and pressing on "Create Bookmark", you will create a new bookmark.
Create a New Folder
Click on + symbol in the bottom part of the screen. You will be presented with a popup, asking you for Title and URL. By leaving URL field empty, and pressing on "Create Bookmark", you will create a new folder.
Deleting Bookmarks or Folders
Please double check before deleting folders because it will irreversibly erase folder and it's contents - every folder and bookmark inside.
That being said, you can erase Bookmark or folder by hovering your mouse of it, clicking on ... that come up and selecting "DELETE".
Screenshots
Cloud Bookmarks™ create screenshots of bookmarked URLs and displays them as thumbnails. It can be done automatically or manually.
Automatic Screenshots
You will find option to enable automatic screenshot generation in the extension options page (). It is called "Always Create Missing Screenshots".
Manual Screenshots
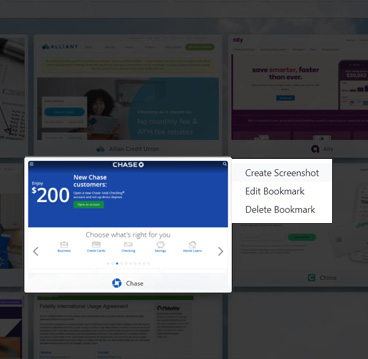
To manually create a screenshot, move your mouse over a bookmark, click on "..." and then select "Create Screenshot" option.
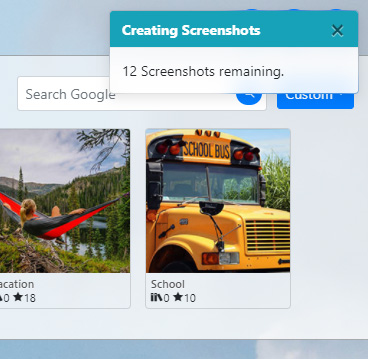
You will notice that, when a screenshot is being made, a minimized window is opened in the taskbar. That is because in order to create a screenshot, we need to open the page and let it completely load. Then we save the screenshot in your browser database.
Account & Synchronization
As a free user, you are entitled to a certain amount of daily backups. They should be done automatically once you create the account and connect to our server.
First step would be to register by clicking on the icon of a person () in the top right corner.
Once registered, you should be signed in as well and bookmark backup should be in progress.
If you have already registered on our website, you can use those credentials to sign in to the extension.
You can use the same credentials for this website and for the application.
Restoring the Backup
If you have lost your bookmarks, or simply wish to test this feature, you can restore them from a backup on our servers by clicking the "Backup Restore" () button in the top row*.
During the restore procedure, all current bookmarks will be moved under new folder in "Other Bookmarks".
*you need to be logged in the extension (not the website), otherwise you won`t see the "backup restore" button.
Layout
Resize Bookmark Thumbnails
Click on the utmost top right icon to pull up a side menu.
Option "Bookmarks Per Row" will let you resize thumbnails by changing how many of them are displayed in a row.
Change Tab Background
Click on the utmost top right icon to pull up a side menu.
You will be provided with 3 options:
- No image: This option will give you a clean white background,
- Default: You can choose one of pictures that came along with the extension.
- Upload: Upload any picture you'd like.


